
Knowing how to froth milk opens up the path to brew your own latte, cappuccino, and other beverages at home. There are several options and gadgets available to froth milk. Knowing how to use a milk frother will make the whole process a lot easier and smoother.
For this guide, I’ll stick to the use of dedicated milk frothers. Equally importantly, we’ll talk about the basics necessary to get milk to froth well.
Top 3 Notable Milk Frothers To Consider
1. Secura 4 in 1 Electric Automatic Milk Frother
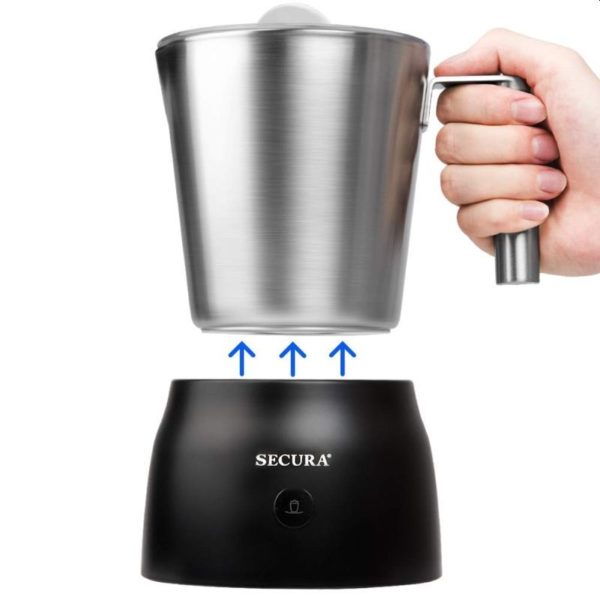
Secura 4 in 1 is a cost-effective automatic milk frother that offers several additional functions. The machine is rather compact and is topped with a stainless steel jar. This removable jar has a volume of 8.45oz and is very convenient for use.
The jar markings for minimum and maximum volume of milk for frothing. Simply fill milk up to the desired level, add the frothing disk, and switch on the machine. Its temperature control is efficient enough to heat the milk to the right temperature. Then the frothing disks spin into action and froth milk to a perfect texture.
If required, you can skip the frothing and simply heat milk in this container. Or, skip the heating and get cold foam! A clear lid covers the jar so you can see the froth being formed. The jar and the lid are both dishwasher safe.
2. Miroco Electric Milk Steamer Soft Foam Maker
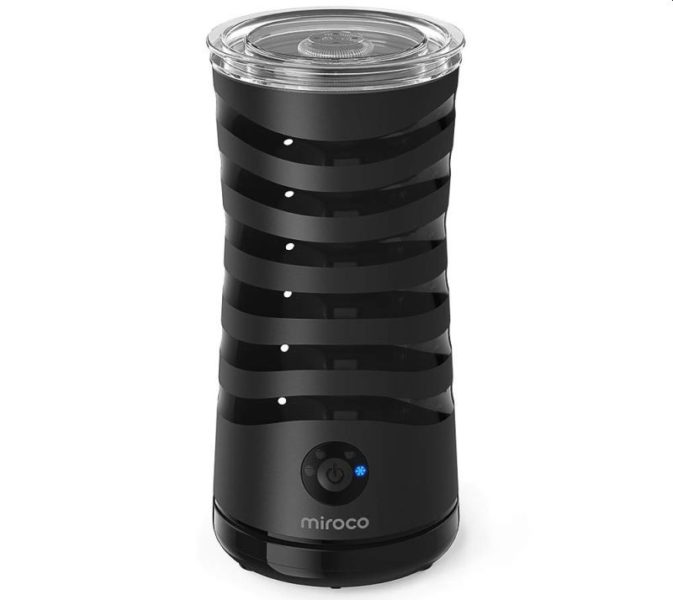
This one too is an automatic milk frother, though with a compact form and interesting design. Pour milk into this frother and hit a button to get the froth ready in seconds. Even with its compact size, it includes the most desirable options for frothing.
You can pick from cold or hot froth. Miroco Electric Milk Steamer Soft Foam Maker can also heat milk to a maximum temperature of 149℉. You can heat up to 240ml of milk in this machine. However, don’t add any more than 115ml of milk for frothing.
The machine offers three textures for foam, which are cold milk froth, hot airy foam, and hot dense foam.
Check current price and discounts
3. Secura Automatic Electric Milk Frother and Warmer
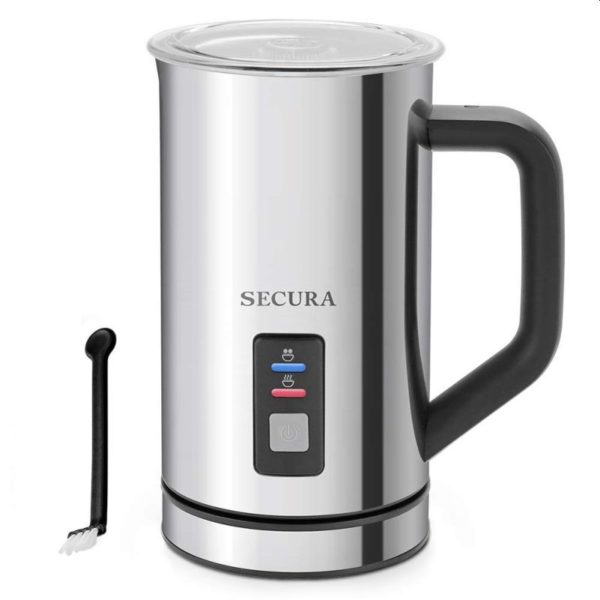
Secura Automatic Electric Milk Frother and Warmer pretty much looks like a percolator or an electric kettle. That’s perhaps where we can end the comparison. This takes on a more compact shape than the 4-in-1 frother we saw earlier.
The base of the machine is tiny and most of it is the carafe/jug itself. You can choose between hot and cold foam, then set the frother off on its merry way. It can heat about 250 ml of milk or froth about 100 ml of milk.
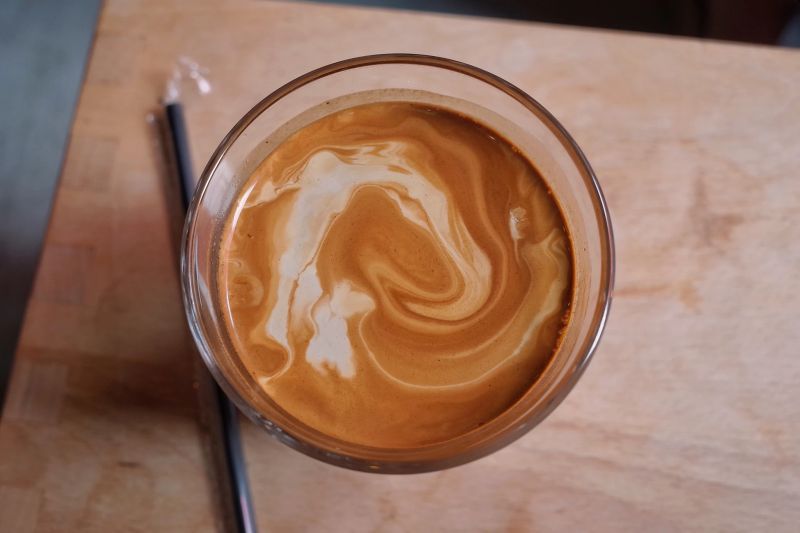
[su_note note_color=”#FFFF66″ text_color=”#333333″ radius=”3″ class=”” id=””]A quality milk frother will bring out microfoam that’s velvety and uniform.[/su_note]
Tips And Pointers To Know Before You Start Frothing Milk
Milk Selection – Whole Milk, Skim Milk, And Non-Dairy Alternatives
Choosing the kind of milk you should froth depends on your individual requirements and how experienced you are. Your best choice is to pick whole milk. It lends itself beautifully to microfoam and pretty much leads to the textbook milk froth we all want.
It does require a little more effort though and isn’t the best choice for beginners. However, if you have good culinary skills and are a beginner to frothing milk, give it a shot anyway.
[su_note note_color=”#FFFF66″ text_color=”#333333″ radius=”3″ class=”” id=””]Skim milk is the best choice for beginners. It’s not the best overall choice for frothing, but it allows a higher margin of error. Plus, it holds foam better at room temperature.[/su_note]
Non-dairy alternatives have varying performance depending on their source. It’s not a simple almond milk versus soy milk comparison. Even different almond milks will react differently to frothing.
The key element to watch here is protein content. Higher the protein content in your milk, better the frothing.
Getting The Milk Temperature Right
There are two temperature ranges to froth milk. Cold milk frothing works best for cold milk but can also be applied to milk at room temperature.
However, for use in a latte or cappuccino, you want warm foam. Getting the temperature right is the key to a good foam. The ideal temperature for frothing milk is 140-155 degrees Fahrenheit. It’s good to use a thermometer if you want precise and accurate readings.
Some automatic milk frothers do this temperature management for you. Those who are experienced can pretty much wing it and guess the right temperature for frothing.
[su_note note_color=”#FFFF66″ text_color=”#333333″ radius=”3″ class=”” id=””]It’s important to not let the milk boil. Once it has boiled, milk will not lend itself well to frothing.[/su_note]
If the milk ends up boiling as you heat it, the better option is to start with a new batch.
How Much Milk Should I Use?
The exact quantity depends on your requirements and the capacity of the milk frother you’re using. Expect the milk to double in volume as it froths. So, to keep on the safe side of things, never fill the frother for more than half its volume. In fact, leave some space there too to account for changes and ease of use.
Most milk frothers that have a carafe or vessel have markings for the maximum volume of milk they allow. There will be plenty of empty space in the carafe once you fill up to this maximum line marking. Don’t be tempted to go beyond this limit!
When To Stop Running The Milk Frother
In most cases, you’ll see the volume of milk double in 30-40 seconds. The milk will foam and froth and there will (hopefully) be a uniform microfoam available.
Even if things don’t go according to plan, don’t overdo it! It’s wise not to keep the frother or wand running in the hopes that the milk will froth soon. Going overboard can degrade the foam already present, and could even end up drawing some butter.
Grooming Foam For Better Consistency
Often, you’ll have to groom or “encourage” the foam to get a better consistency. Even if you do everything right and get velvety microfoam, there’s a good chance that a few large bubbles will be lurking around. A good, strong tap on the container usually bursts those larger foam bubbles.
Note that grooming is a way to encourage a consistent foam. It works great if the large bubbles are few and far between. However, it won’t work that well if there are several large bubbles in the mix.
Microwaving Frothed MIlk
Microwaving can be an unusual but very helpful approach for beginners. If you frothed hot milk, there’s a good chance its temperature went down significantly by the time frothing was done. And it will likely go down more before the froth is poured into coffee.
A good way around this problem is to microwave the milk froth. Put it in a microwave and give it about 30 seconds for heating. Remember to consider the amount of froth and temperature. Adjust the time to ensure that the milk doesn’t boil.
Microwaving frothed milk warms it up, and as an added benefit also stabilizes foam and bubbles.
Step-By-Step Guide On How To Use A Manual Milk Frother
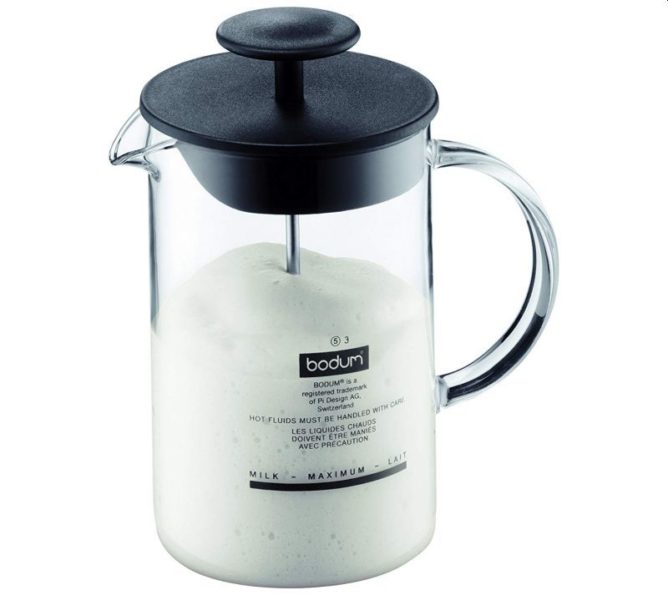
In terms of its appearance and construction, a manual milk frother is pretty much a twin of the French press. Essentially, you could interchange the use of a French press and manual frother to get similar results. There’s a slight difference in microfoam quality from a French press and manual frother. For an average user, the difference would be minimal.
Unsurprisingly, manual frothers make use of the plunger style or hand pump style for frothing. There is a bit of manual effort required from the user. It isn’t exactly hard labor, but it can be intense for the few seconds that need action.
Step 1: Initial Preparations
The first point of order is deciding if you want hot or cold foam. If cold foam is the choice, you can pour milk directly into the frother’s carafe. For hot foam, heat the milk to 140-155 degrees Fahrenheit before pouring it into the carafe.
Manual milk frothers usually have a marking that signifies the maximum amount of milk to add. This can seem deceptively low. But remember, the milk will almost double in volume with frothing. Also, the plunger will move milk around and can cause spills if you’re not careful.
In case there is no marking for maximum, or if you’re using a French press, don’t fill up any more than one-third of the carafe.
[su_note note_color=”#FFFF66″ text_color=”#333333″ radius=”3″ class=”” id=””]Attach the lid securely. Lids often have an opening to match the spout on the carafe. You’ll have to make sure this lid and spout are not aligned when you start working on the plunger.[/su_note]
Step 2: Give It A Test Run
Once everything is in order, give the milk frother a test run. Push the plunger a few times to ensure that everything is working as intended and that there are no leaks. This will also give you a fair idea of how much force to use. Putting in extra power might end up damaging the carafe or the plunger.
Of course, there’s less to worry about if the carafe is metallic. However, for glass carafes, there’s always a risk of doing some damage. Even so, I continue to be partial to glass carafe milk frothers. The simple reason is that you can actually see the milk and its volume changing.
Visual feedback is a great way to know where you stand. For those who are more experienced, there’s little difference in metal or glass frothers. So let your personal preferences and aesthetics be your guide.
Step 3: Frothing The Milk
It’s time to get to work. Hold the plunger with one hand and the carafe with the other. You may not necessarily need to hold the carafe. However, it’s a good way to ensure it doesn’t move from its place.
Move the handle up and down for about 30 seconds. Remember to temper your strength and be ready to handle some resistance from the plunger.
As the plunger moves, the milk begins to aerate. Frothed milk will provide more resistance to the plunger, so you’ll find yourself adding more pressure with every movement. Soon the volume of milk will nearly double and that’s your cue to stop.
Step 4: Check The Foam
After about 30 seconds, stop and check how well the frothing went. You should see good microfoam ready to be harvested. However, if it lacks the desired consistency and quality that can’t be handled by grooming, get plunging again!
Don’t go beyond a few seconds this time and remember not to overdo the frothing. Once you get the consistency right, transfer the foam to another vessel. If you’re so inclined, you can scoop the frothed milk directly to your coffee cup.
A Guide To Using A Milk Frother Wand
The milk frother wand or the frothing wand is something of a semi-automatic approach to frothing. The wands are portable, convenient, and well-priced. They do a pretty good job of frothing and bring convenience. The microfoam quality can be somewhat lower than what you get with manual frothers or automatic milk frothers.
Step 1: Basic Steps And Preparation
Milk frother wands or whisks can be electric or battery operated. Whatever your choice of wand is, the basics of operation remain the same. Before starting, take the handheld milk frother to the kitchen sink and switch it on for a couple of seconds. This will shake off any impurities or water droplets sticking to the wand.
You’ll also have to decide on the temperature of the milk and pour it into a vessel. Remember not to fill more than one-third of the container with milk.
Step 2: Dip Frother Into Milk
Place the frother above milk and place its head vertically into the milk. Don’t go in too deep and place it so that just the frother’s head is in the milk. As the euphemism goes, it’s just the tip. Although this time, it really just has to be the tip.
Crass examples aside, it’s time to switch on the frother and check its placement. If you put the head in too deep, the frother might make a weird noise. In case the head wasn’t deep enough, it will start sputtering milk around and create a mess. If it was placed just right, the frother will form a small whirlpool near its head.
Now I’m wondering why I used that euphemism. I’ll never look at frothers the same way ever again.
Step 3: Frothing Milk
If you had the frother inserted right, you’ll see froth forming within seconds. Experienced users may want to tilt the container a bit while ensuring that the whirlpool near the frother is not disturbed. It may feel intuitive to move the frother a bit. However, unless you know exactly what you’re doing, leave the frother exactly where it is.
Step 4: Checking The Froth
Since the frother and the milk are both open, you’ll soon see a change in the volume. The foam being formed will also be visible. Once you’ve got the right consistency, it’s time to switch off the frother. The foam may need some grooming before it’s ready to roll.
Using An Automatic Milk Frother
Automatic Milk Frothers are the easiest way to get high-quality microfoam. They also tend to be more expensive than other frothing options. Even the reasonably priced automatic frothers can be significantly more expensive than manual or handheld milk frothers.
Those who have regular use of a milk frother can justify the extra cost of buying an automatic option. Getting quality froth with minimal work is a pretty great feeling.
Step 1: Preparation And Basic Steps
There isn’t much work to do when you’re using an automatic milk frother. Pour the milk into the carafe, while ensuring you stay below the marking for maximum volume.
Step 2: Settings On The Machine
Check the controls on the machine to see that they’re on the desired levels. Automatic frothers will let you choose to work with cold froth or select a temperature for hot milk frothing. Choose the temperature settings you prefer.
Many of these machines also offer additional options. For example, some might simply heat the milk without frothing them, if the user so chooses.
Step 2: Check The Froth
Once you set the machine in motion, it works rather quickly to get milk to the right temperature. The frothing is fairly quick as well and the whole process will be over rather quickly.
In most cases, the result will be velvety microfoam. In the rare instance where there are some big bubbles, it’s nothing a bit of grooming can’t handle.
Using The Right Milk Frother
There are plenty of methods you can employ to froth milk. However, using a dedicated milk frother is the best way to get velvety microfoam. It doesn’t take much to learn how to use a milk frother.
In fact, an automatic milk frother will do all the work for you. For that matter, even if a manual milk frother requires some effort from the user, it’s easy to master. Getting quality frothed milk isn’t difficult, you just need the right tools.