
Frothed milk is the key to good texture and mouthfeel from your beverage. Knowing how to froth milk is more than just getting bubbles on milk. You want the bubbles to be tiny and of near consistent size.
Using gourmet coffee beans and an excellent espresso machine will give you a great shot of espresso. However, its texture and feel will be defined by the frothed milk you add for the latte.
[su_note note_color=”#FFFF66″ text_color=”#333333″ radius=”3″ class=”” id=””]The quality of frothed milk is the difference between a home-brewed or store-bought latte.[/su_note]
Plus, you get to try your hand at latte art, which is a reward by itself! So here’s how to get milk frothing right at home.
Defining Qualities Of Frothing Done Right
How do you know you got milk frothing right? There are some defining traits of the foam that make its quality evident and what to expect from it.
- Microfoam is the most important indicator of quality frothing. The foam should have tiny bubbles – bubbles so small that they’re barely visible. The milk foam should be consistently full of these tiny bubbles. While a few larger bubbles in the mix are okay, the presence of a lot of larger bubbles indicates that something went wrong.
- Texture and mouthfeel of frothed milk should be rich and velvety. This smooth and fine texture, along with how it feels in your mouth can pretty much define how a latte is perceived.
- Time taken to froth milk is important, especially if you’re a beginner. A milk frother that takes most of the work out of your hands is a big help. The frother should also be easy to clean. Remember that not all milk frothers are created equal and results can vary even with each method.
These Tips Will Help You Froth Milk Like A Pro

Do Not Boil Milk
Not only should the milk not boil when you’re heating it, it’s better not to use milk that has boiled before.
The Right Milk Temperature
Temperature is a key element, especially if you’re aiming for hot foam. The magic temperature you’re looking for is between 140 and 155 degrees Fahrenheit. You can use a thermometer or make a good guess, just remember that the milk should not boil! Most automatic milk frothers have a temperature setting to keep froth at the right temperature.
Grooming Foam For Best Results
Grooming the foam is acceptable. We want a uniform foam. So, if there are a handful of larger bubbles in an overall velvety foam, burst those. Tapping on the container with some force should do it. Keep in mind, grooming is for the random oddity, not for bursting a chunk of bubbles.
Know When To Stop
You’re frothing milk, not churning butter! Overdoing it can cause some of the milk fat to start forming butter, especially if you’re a beginner. Don’t assume that spending some extra time running the frother will get you better foam.
How To Froth Milk Alternatives Like Almond Milk
Milk alternatives can be notoriously difficult to froth. If you coax them into foaming, it will begin to separate soon. However, things are changing. Milk alternatives with higher protein content (and higher almond content) froth pretty well.
For many of them, you can barely tell the difference between almond milk froth and froth on regular milk. Coconut and soy milk can be a bit trickier but can lead to acceptable microfoam.
Popular Frothing Methods That You Can Try
There are several ways to froth milk. For this article, I’ll discuss the popular ones. Not all frothing methods are created equal. Some of these are naturally likely to give better results compared to the others. For a few, your culinary skills will play an important role in getting the milk to foam. Here are the top methods to use:
- Automatic milk frother
- Pump frother
- Frothing wand
- Steam Wand
- Whisking by hand
- Shaking a jar
- Using an immersion blender
- Using a blender
- French press milk frother
- Pulling method
Using An Automatic Frother
As their name implies, automatic frothers do most of the work for you. Just switch it on and you’ll get a lovely microfoam at the right temperature, and with the right texture. Minimal manual intervention is required to get the automatic frother going.
Most automatic frothers will give you the choice of choosing between hot and cold foam. If you choose the former, you can decide the temperature of the milk. The frother will heat milk, froth it, and have it ready in just a couple of minutes.
Top Recommendation – Souvia Automatic Milk Frother and Steamer

Souvia Automatic Milk Frother is simple, fast, and convenient. Equally importantly, it is cost-effective. The biggest downside of using automatic milk frothers is the cost involved. They’re priced significantly higher than other milk frothing solutions, which can be a roadblock in picking these appliances.
By going cost-effective, Souvia tries to lower that curve. It’s still more expensive than other methods, but fairly cheaper than its competitors.
A 700ml carafe on top of the machine is large enough to handle the milk frothing needs of homes. Two frothing disks are included with the machine. The latte disk gets a smooth foam, while the cappuccino disk goes for a thick and creamy froth. Both of these options work great.
The frother includes options for hot and cold foam. Milk temperature selection is available for hot foam. The carafe is made from stainless steel and is dishwasher safe.
Using A Pump Frother
A manual pump frother is an excellent way to get quality froth from your milk. These frothers are quite similar to a French press in the basics of construction and operation. They won’t brew coffee as well as a French press, but they’ll froth milk slightly better than it.
When using a pump frother, fill up about one-third of the carafe with milk at the desired temperature. Then place the lid and pump the handle for about 20-25 seconds. Quality microfoam is ready for use!
[su_note note_color=”#FFFF66″ text_color=”#333333″ radius=”3″ class=”” id=””]For any milk frother, expect the volume of milk to double after frothing. To keep a safety margin, it’s best to fill no more than one-third of the carafe (or vessel) with milk.[/su_note]
Editor’s Choice – Norpro Glass Froth Master

Norpro Glass Froth Master has a glass body combined with a stainless steel plunger and filter/frother disk to handle milk frothing duties. The glass carafe is a tall cylinder with a pronounced spout.
Overall, it has great looks and excellent shape. There are downsides to using glass as the carafe and there’s always a risk of breakage. The other gripe I have with this is that there’s no handle. Be extra careful of touching the surface if you’re using hot milk for frothing.
Frothing Wand
As dedicated milk frothing options go, frothing wands are amongst the most convenient options. They can be fairly compact and be very competitively priced. Frothing wands, also known as handheld milk frothers, are powered by battery or electricity. Of course, the power source depends on the model, and there’s a fairly wide range to pick from.
To froth milk, dip the wand into the milk and move it around slowly. Soon enough, you’ll see the volume of milk increasing and froth forming. It won’t be as good as an automatic frother or even the pump frother, but it’s fairly good. Don’t expect the microfoam to be uniform, but for the price and convenience, it’s hard to beat.
Top Choice – PowerLix Milk Frother
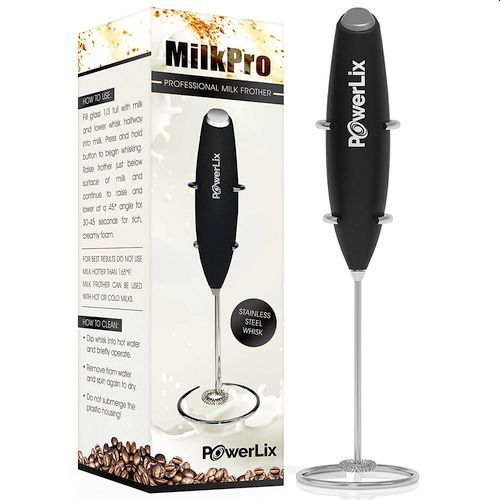
PowerLix Milk Frother is a compact and convenient option that draws power from two AA batteries. The battery use is fairly economical but don’t expect them to last very long on regular use.
The frother includes a stainless steel whisk for its frothing duties. It’s fairly easy to clean and has a fairly good lifespan.
Steam Wand Milk Frothers
Steam wand milk frothers are most commonly seen with some espresso machines. Basically, the steam generated by heating water is sent through the wand to steam and froth the milk. The foam quality won’t knock your socks off, but it is fairly acceptable.
Push the tip of the steam wand into the milk and let it do its job. The force of the steam will froth the milk while heating it at the same time.
Performance and foam quality can vary with the machine. Sometimes, it results in wonderful microfoam. Some machines might just make a mess out of things. If you have an espresso maker with a steam wand, give it a shot.
Whisking By Hand To Get Foam
Whisking by hand is something of an old-fashioned method. It doesn’t usually lead to the microfoam that is the holy grail of frothing. However, it can be useful if you’re in a tight spot.
Place a whisk in a container of warm milk. Whisk it vigorously for about a minute to froth milk using this method.
Shaking A Jar To Foam Milk
This method is simpler and is comparatively less intensive. However, the quality of foam from shaking a jar is lower than even the whisking by hand method.
Don’t expect impressive, velvety microfoam from this method. But don’t put it down so easily either! It’s a fairly well-liked way to froth milk or even foam coffee. The traditional Greek frappe actually recommends shaking the frappe in a jar.
To froth using a jar, fill it up to about one-third level with milk. Place the lid and secure the jar so that milk or foam doesn’t spill out. Now shake it for about a minute. The method is fairly intensive and requires a lot of work. The foam formed won’t be uniform and will have very large bubbles.
Using An Immersion Blender
Immersion blenders aren’t quite the best tool for frothing, but they can be used if necessary. At the very least, they’re less of an effort than using a manual whisk! The household immersion blender is quite similar to the frothing wand in shape, though it tends to be bulkier. On the plus side, it’s also more powerful.
Many immersion blenders also include a selection of blades and attachments. Some of these attachments may be more useful for frothing milk.
When using a blender, put the milk in a tall container and fill it to about one-third of the available volume. By their very nature, these blenders are more likely to spill the milk or create a mess. So extra precaution is more desirable and useful.
For all the effort that goes into it, the frothing quality is mediocre at best. If at all possible, it is best to avoid this method.
Using A Blender To Froth Milk
Blenders are trusty appliances that are present in pretty much all households. Given their popularity, it makes all the sense to give these appliances a shot at frothing milk.
Fill about one-third of the jar with milk and secure its lid tight. There is a big risk of spilling and a big mess coming out of the use of this method. As an added precaution, consider placing your hand on the lid to hold it in place. Once you’re ready, run the blender on medium speed and stop after a few seconds.
Don’t spend much time running the blender. It won’t hesitate to start pulling out butter from the milk within seconds. The foam quality is middling and there’s a questionable effort to rewards ratio with this method.
French Press Milk Frother To The Rescue
If you enjoy coffee, there’s a good chance you already have a French press at home. This coffee maker is especially adept at frothing milk. In function and construction, the French press is quite similar to pump frothers as we saw above.
The foam quality produced by this method is excellent, if only slightly lower than a pump frother. Overall, it isn’t much trouble. If you already own a French press and need to froth milk only occasionally, don’t bother with any other method or appliance.
Editor’s Choice – Bodum French Press
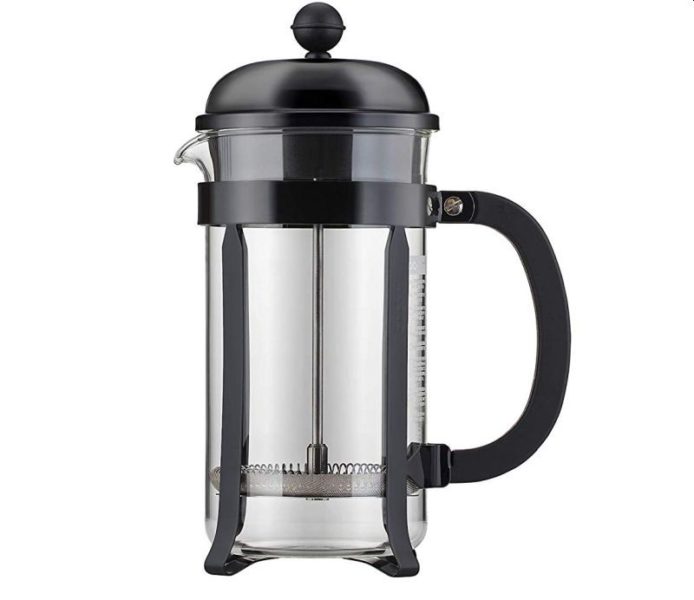
Bodum French Press is pretty much a no-brainer in this category. The brand has a reputation for excellence and quality. Bodum French Press is available in plenty of size and color options so you can take your pick.
The carafe, filter, and plunger are all dishwasher safe. This makes it easy to maintain and clean this French press as necessary.
The Pulling Method For Milk Frothing
The pulling method is probably ancient, where milk frothing is concerned. It is also inefficient, intense, and has a whole lot of risk of creating a mess. Basically, you pour milk from one container to another. Higher the height from which the milk falls into the container, the more it is aerated and the better the froth.
As you can guess, there’s a massive chance of even a small mistake creating a big mess to clean. And even for all that effort, the milk quality isn’t impressive, to say the least. To be honest, it’s a bit of fun pouring milk from one container to another. But it’s a crazy amount of risk for some low quality foam.
To see what I mean, check out this video of a dude in Thailand pulling tea.
The Art Of Frothing Milk At Home
Making a good latte or cappuccino at home shouldn’t be off the cards for the sake of frothed milk. There are plenty of ways to get good froth at home. You can get an automatic milk frother or learn how to froth milk with the methods mentioned above.
Using a pump frother or French press are quite easy and cost-effective ways to froth milk. Or if you’d like to stay on the quick and convenient side, get an automatic milk frother.