Ever wondered why the taste of your coffee has gradually changed since the past few days, weeks or maybe even a month? You are doing everything right and it’s the same coffee you have been drinking since the past few years, then what could be possibly going wrong?
Your Coffee Maker Needs Your Attention
Guess what – your coffee maker is asking for your time and attention! In a few easy, hassle-free steps, you will know how to clean a coffee maker regardless of what type of coffee maker you have.
In today’s fast-paced digital era, I understand it’s not easy to take out time from your busy schedule for cleaning your kitchen utensils and electronic appliances. There is a whole lot of other stuff to take care of, right? Yes, I feel you.
Here are some easy ways to clean your coffee maker.
Clean Coffee Maker With Vinegar:
Regardless of what type of coffee maker you have, cleaning it with vinegar is considered to be one of the most cost-effective and widely recommended solutions that you will find over the internet.
The Supplies:
You will need the following items in order to clean your coffee maker with vinegar:
- Soapy water (preferably made with a detergent)
- White Vinegar
- Soft Cloth
White vinegar is said to be a natural cleaning agent. All that yeast, mineral deposits and mold that you might see permanently settled at the bottom of your coffee maker carafe, cleaning it white vinegar will take care of it.

White Vinegar – Get it on Amazon
A lot of coffee baristas suggest that you should clean your coffee maker with white vinegar at least once every four to six months to keep your machine operational at full efficiency.
The Process:
Once you have the supplies ready and are all geared up for the cleaning process, just follow these steps:
Make Sure it is Switched Off:
The first and foremost step is to ensure that your coffee maker is not connected to any electrical point. If it is, switch off the coffee maker and remove the plug from the socket for added safety measures.
Remove and Wash the Parts:
Once switched off, make sure that your coffee maker is fully empty. Then remove its parts – the carafe, filters, filter basket, pot, brew basket and any other removable part of your machine. Put the parts in the dishwasher and run at least one dishwashing cycle to make sure the parts are all clean.
Replace the Filter (if applicable):
Some coffee makers come with a filtering system, you might want to have a look at your instructions manual to check whether your filter needs to be replaced or not.
Mixing of Vinegar with Water:
After removing the parts, pour white vinegar into your water reservoir, enough to fill up half of it. After that, add water to the white vinegar till your reservoir is full. Now, you should have an equal composition of white vinegar and water in your water reservoir.
Run Your Coffee Maker:
Run the cycle and stop it midway through the drip cycle so that the vinegar and water solution can sit in the reservoir for more effective cleaning. Allow it to sit for twenty to thirty minutes in both the water reservoir and the carafe.
After about an hour, run the brew cycle just like you would as if you are making your coffee. Once the brewing is done, get rid of the white vinegar and water mixture from the carafe.
Get Rid of the Vinegar:
Once you are done with the solution cycle through your coffee maker, now you need to get the vinegar out of your coffee machine. For this, run the same process with only water this time – ensuring that the coffee maker is allowed to cool down each time before starting with the process.
[su_note note_color=”#FFFF66″ text_color=”#333333″ radius=”3″ class=”” id=””]Did you know? – Lemon juice can be used as an alternative if you do not have vinegar[/su_note]
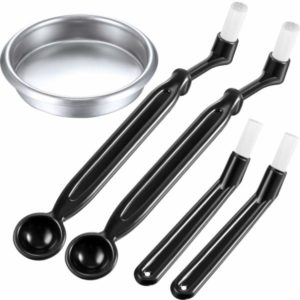
Coffee Machine Cleaning Set – Buy it on Amazon
Cleaning Various Types of Coffee Makers:
You might assume that the cleaning method for all types of coffee makers is the same, well that is not entirely true. The cleaning process and supplies do differ between the various types of coffee makers.
Let’s have a look at the different types of coffee makers first:
- Stainless Steel Coffee Percolator
- Drip Coffee Maker
- French Press
- Espresso Machine
- Pour Over Coffee Filter
How to Clean a Stainless Steel Coffee Percolator:
There are have been a lot of advancements and upgrades as far as coffee making machines and their designs are concerned. However, if you are old-school and love your coffee made the traditional way, then you are surely a fan of stovetop or the stainless steel coffee percolator.
Supplies You Need:
To clean a stainless steel coffee percolator, you would need the following items:
- Water
- Baking Soda
- Vinegar
Cleaning Methodology:
- The first step is to make sure there is no active electrical connection between your coffee percolator and the socket.
- Open the lid of your coffee percolator and fill the pot with water
- Pour baking soda into a dry cup unless it fills quarter of it.
- Now pour half of the quarter cup baking soda into the filter, remove the filter, and pour the rest of the baking soda into the pot.
- Close the lid, plug your machine to the socket and switch it on. Let the cycle run for a few minutes.
- After the cycle is complete, unplug your machine again. Empty your coffee maker completely.
- Now pour the vinegar into an empty cup unless it is half full and then empty the cup into your coffee maker.
- Plug the machine back in and percolate the vinegar just like you did with the baking soda earlier.
- When the cycle is complete, remove the plug and empty the vinegar from your machine.
- Repeat the above procedure with clear water once or twice in order to remove any baking soda or vinegar remains from your coffee percolator.
If you follow the aforementioned guidelines properly, your stainless steel coffee percolator will have its original shine back, as if it’s new!

Brew Rite Coffee Maker Cleaner – Shop on Amazon
How to Clean a Drip Coffee Maker:
Ever thought why your drip coffee maker is taking longer than usual to prepare your cup of coffee? Or that color of your coffee is mix is not that you are used to seeing? Well, this happens when the mold and mineral or calcium deposits sit at the bottom of your carafe for far too long.
Time to clean up!
Supplies Needed:
- White Distilled Vinegar/Regular White Vinegar
- Water
The Right Steps to Follow:
- Fill up your drip coffee maker with water. Check the gauge, stop filling when it reaches half.
- Add distilled vinegar and fill it up completely.
- Run the machine and carry on with any other work activity that you were doing before as this could take some time.
- When the cycle is complete, switch it off and allow it to cool down.
- Now, take the carafe out and pour the solution back into the reservoir.
- Switch the machine back on and start with the second round.
- You will observe that the second cycle will be a lot quicker than the first. This means that your drip coffee maker is a lot cleaner now.
- Repeat the process again with clear water to rinse out vinegar from your machine.
The only factor that is to be monitored here is that your second round should be a lot quicker than the first – this is a direct sign that your drip coffee maker was not clean before and now it sure is.
How to Clean a French Press:
Since the cleaning procedure is considered to be an easy one for the French Press coffee maker type, a lot of people think it can be cleaned using bare hands to take the coffee deposits out and pouring them down the drain – that’s not right though.
Yes, it’s relatively easy to clean a French Press, still you would need to have the following supplies and go through the right process:
- Fine Mesh Strainer
- Warm Water
- Soap
How To Go About It:
- Fill half of your French Press with warm water.
- Pour the coffee grounds out using the strainer and dump it in the trash.
- Now pour your French Press again with warm water and add some soap as well this time around.
- With the help of the plunger, move it up and down for a few times.
- Wash the pot again with water a couple of times.
Yes, it is easy but you still need to make sure you are doing it the right way in order to get rid of the coffee grounds properly.
How to Clean an Espresso Machine:
Whether you are a professional barista or someone who wants to do it at home, cleaning an espresso machine might seem a difficult process, however, if you will the steps mentioned below, it ain’t rocket science.
What Do You Need?
- Portafilter basket
- Espresso Scrub Brush
- Cleaning Chemical
Since this type of coffee maker is a much bigger equipment, we use the process of backflushing to clean it. Backflushing means to use a blank, solid portafilter basket instead of the one that has holes in it that lets the Espresso to pass through. Then we put it in the machine the same was way as we are getting Espresso from it, however, the only difference is that we pull the shots at shorter intervals (5-8 seconds preferably).
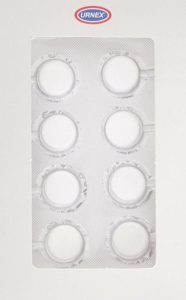
Urnex Cafiza Espresso Machine Cleaner Tablets – Buy it on Amazon
Steps to Clean Espresso Equipment:
- Scrub the screen using an Espresso Scrub brush while running the water in the machine.
- Get a blank portafilter basket that is solid on the base (no holes at the bottom).
- Put the basket in the machine and pull regular shots at 5-8 seconds intervals.
- Dump out the dirty water and repeat the process for about 8-10 times.
- For the final step, run the water and move the portafilter basket a couple of times on either sides so that it cleans the edges of the screen and grouphead.
- Now, repeat the same backflushing process using a cleaning chemical this time. Pour a small amount of the chemical (one teaspoon) in the basket and start with the backflushing process once again.
- To get rid of the chemical, run the process once or twice again with clean water towards the end.
How to Clean Pour Over Coffee Filter:
A pour over coffee maker is mostly used by those who are overly concerned about the hygiene levels in their cup of coffee. If you are one of those, cleaning it on a regular basis is surely on the top of your priority list.
Stuff You Need:
- Iodized Salt
- Pure Ice
How To Do It:
- Pour some ice into your coffee maker. Fill it up till it reaches half level.
- Add some salt into it.
- Mix the ice and salt for about 2-3 minutes.
- Once the solution comes back to room temperature, pour it out and empty the coffee maker.
- Wash it with slightly warm water once or twice to make sure the coffee maker is clear of salt residue.
Regardless of what type of coffee maker you have, now you know how to clean your machine. Now let’s have a look at how brand-specific coffee maker can be cleaned.
The following directions will make your machine last long and make your coffee taste better, too.
[su_note note_color=”#FFFF66″ text_color=”#333333″ radius=”3″ class=”” id=””]I know well about coffee maker cleaning, yes – but the manufacturer knows it better! Please do not ignore the directions in your machine’s instruction manual.[/su_note]
How to Clean a Keurig Coffee Maker:
One of the better brands that you will find in the market, Keurig coffee maker can be cleaned using the following items:
- White Vinegar
- All-purpose Cleaner
- Dishwashing Liquid
- Cleaning Toothbrush
- Microfiber Cloth
Keurig Cleaning Steps:
- First step is to remove all the removable/detachable parts of your Keurig coffee maker one by one – this will include the lid, reservoir, K-cup holder, funnel, drip tray and drip tray cover.
- Clean all the removed parts by putting them in a dishwasher using a dishwashing liquid.
- Now open your coffee maker and clean it with a toothbrush.
- Clean the rest of the machine with the microfiber cloth and the all-purpose cleaner.
- If there are any visible deposits or white bits on the edges, soak the cloth in white vinegar and clean with it.
- Put all the parts back and pour white vinegar halfway through the reservoir.
- Run a brew cycle with white vinegar only.
- Repeat the process until vinegar is completely gone from the machine.
- Repeat the process with water so that vinegar leftover is also washed out.
Some Important Tips for Your Keurig Coffee Maker:
- Use distilled water instead of tap water – distilled water doesn’t have any minerals like calcium (that leads to calcium build up)
- If you are going away for a while and machine will not be used – empty the reservoir so that no deposits are made as the water will evaporate quickly
- If you are making hot chocolate or iced tea, run through a cleansing cycle once you are done with your drink – If you do not do that, the sugar will crystalize and clog your Keurig coffee maker
How to Clean a BUNN Coffee Maker:
Another popular brand is the BUNN coffee maker. As per the manufacturer’s recommendation, the machine should be cleaned every three months to maintain optimum operational efficiency. In order to clean this machine, you would need the following things:
- Vinegar
- Dish soap
- Toothpick
How To Do It:
- Pour four cups of vinegar into the reservoir.
- Then wait for carafe to fill up.
- Now you can switch off the machine and unplug it from the electric socket while it’s brewing.
- After waiting for about two hours, remove the spray head (removing it earlier is not recommended as it might be too hot)
- Clean the spray head with a toothpick for any mineral deposits and then wash it with soap.
- After that, fill up the carafe with clean water.
- Pour the water from the carafe into the brewer and wait for it to completely flush out.
- Repeat this process for about 4-5 times (till the smell of the vinegar is completely gone).
How to Clean a Cuisinart Coffee Maker:
One good feature about the Cuisinart coffee maker is that it comes with a ‘self-clean’ mode. Also, the manufacturer suggests to change the water filter every 60 days or 60 uses, which means that’s about the time you need to run the self-clean mode, too.
Before you start with it, let’s have a look at the items that you will need here:
- Charcoal Water Filter
- Vinegar
- Cold Tap Water
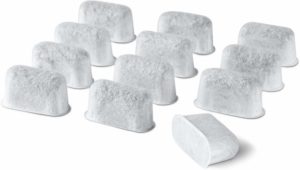
Cuisinart Replacement Charcoal Filter – Get it on Amazon
Cleaning the Cuisinart Coffee Maker Using Self-Clean Mode:
- Remove the water filter holder from the reservoir and throw away the old filter in the trash.
- Place a coffee filter in the basket to check for particles and debris.
- Open up the new pack of charcoal filter and put it into a glass of cold tap water and allow it to soak.
- While it’s soaking, fill the carafe with vinegar and water.
- For a 12-cup Cuisinart coffee maker, fill four cups with white vinegar and eight cups with cold tap water.
- Pour the mixture in the reservoir.
- Add a coffee filter in the filter basket.
- Press the self-clean button and turn on the coffee maker.
- One cycle is enough. It takes around 30 minutes for the cycle to complete.
- Dump the hot water from the carafe and allow it to cool.
- Check the coffee filter for particles and debris. Discard the filter and place the basket in the coffee maker.
- Fill the carafe with fresh cold water, add it to the reservoir and run the brew cycle.
- Dump the water from the carafe again.
- Place the soaked filter in the water filter holder.
- Slide the water filter holder back into the coffee maker.
Following these easy steps, your Cuisinart coffee maker can be thoroughly cleaned using the self-clean mode.
How to Clean a Ninja Coffee Maker:
If you own the Ninja coffee maker or anyone you know in your surroundings who does, then you might heard of the cleaning light issue. There is a cleaning indicator on this machine that a lot of people complain just doesn’t go away even after the machine has been cleaned.
So how do you actually clean the Ninja Coffee Bar? Let’s have a detailed look. But first, these are the items you will need:
Items Needed for Cleaning:
- White Vinegar
- Water
The Cleaning Procedure:
- The first step is to make sure the cup selector dial is set on full size carafe.
- Fill the water reservoir with white vinegar up to the travel mug label mentioned on the reservoir.
- Fill the rest of the reservoir with water.
- Press the clean button on the machine.
- It takes about one hour to complete the cleaning cycle.
- At this point you might notice that the clean light won’t be solid anymore. Instead, it will be in a blinking state.
- Now, empty the carafe and rinse with water.
- Remove the water reservoir and fill it to the top with water.
- Press clean button one more time.
- The flush process takes about 8-10 minutes to complete.
Clean Coffee Maker – Maintain Your Coffee Taste
Regardless of what coffee maker type or brand you own, one fact will always remain constant – Your coffee cup will taste differently if the machine you are using is not clean, period. The calcium minerals, deposits and coffee grounds will gradually affect your machine’s performance and shorten its life, too.
So go clean your coffee maker today and enjoy the same taste of coffee that meets your expectations like it always had!